From Zero to kubectl in 5 Minutes — Managed Kubernetes on Your Own Metal
Every platform team has faced this: a new project needs a Kubernetes cluster. With cloud providers, that means a new billing account, region selection, networking decisions, and a baseline cost of $70–300/month before a single pod runs. Self-hosting with kubeadm? Days of setup, certificates, etcd management, and upgrade anxiety. Rancher helps, but you’re still managing the lifecycle yourself.
What if creating a production-grade Kubernetes cluster was as simple as filling out a form?
Deploy a Managed Kubernetes Cluster
Cozystack uses Kamaji for control planes (running as pods — no dedicated VMs for masters), Cluster API for lifecycle management, and KubeVirt for worker node VMs. You pick the version, the instance type, and how many nodes you want.
Via Dashboard
- Open the Cozystack dashboard at
https://dashboard.<your-domain>. - Navigate to the Marketplace and find Kubernetes.
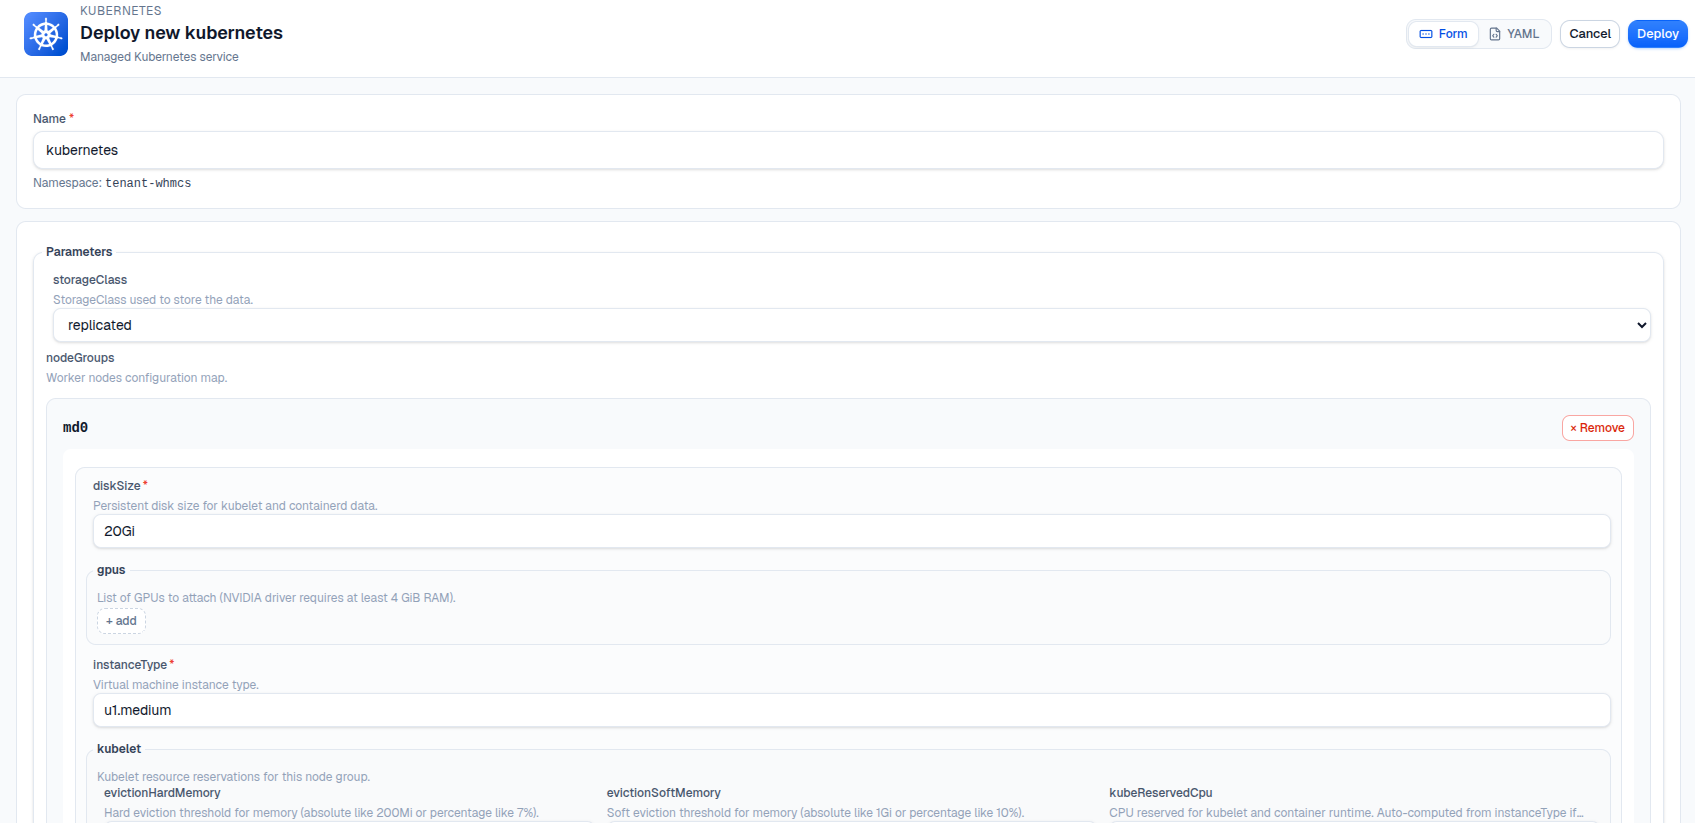
- Click Deploy and configure:
- Name: e.g.,
dev-cluster - Version: pick from v1.30 to v1.35
- Node group: set
minReplicas: 2,maxReplicas: 5 - Instance type: e.g.,
u1.large(2 vCPU, 8 Gi RAM) - Addons: check
ingress,cert-manager,monitoring
- Name: e.g.,
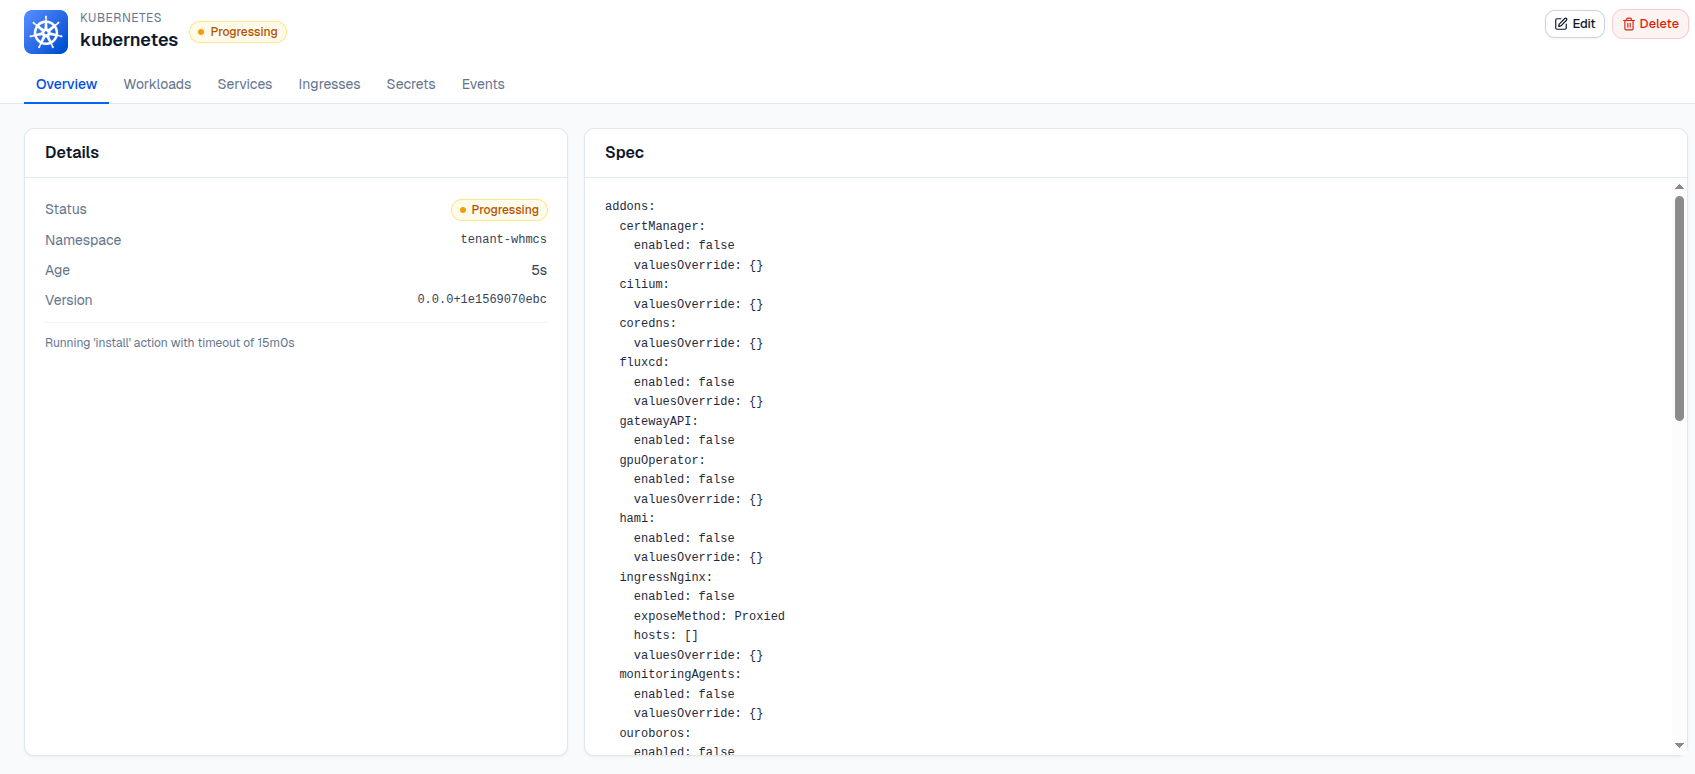
- Click Deploy.
Worker nodes boot as VMs, join the cluster, and become Ready — typically within 3–5 minutes.
What’s included: Every cluster comes pre-configured with Cilium CNI (eBPF-based networking), KubeVirt CSI driver (for persistent volumes), and Cluster Autoscaler (automatic node scaling based on demand).
Via kubectl
apiVersion: helm.toolkit.fluxcd.io/v2
kind: HelmRelease
metadata:
  name: kubernetes-dev
  namespace: tenant-team1
spec:
  chart:
    spec:
      chart: kubernetes
      reconcileStrategy: Revision
      sourceRef:
        kind: HelmRepository
        name: cozystack-apps
        namespace: cozy-public
  interval: 0s
  values:
    host: dev.team1.example.org
    version: v1.33
    nodeGroups:
      md0:
        minReplicas: 2
        maxReplicas: 5
        instanceType: u1.large
        ephemeralStorage: 20Gi
    controlPlane:
      replicas: 2
    addons:
      ingressNginx:
        enabled: true
      certManager:
        enabled: true
      monitoringAgents:
        enabled: true
kubectl apply -f kubernetes-dev.yaml
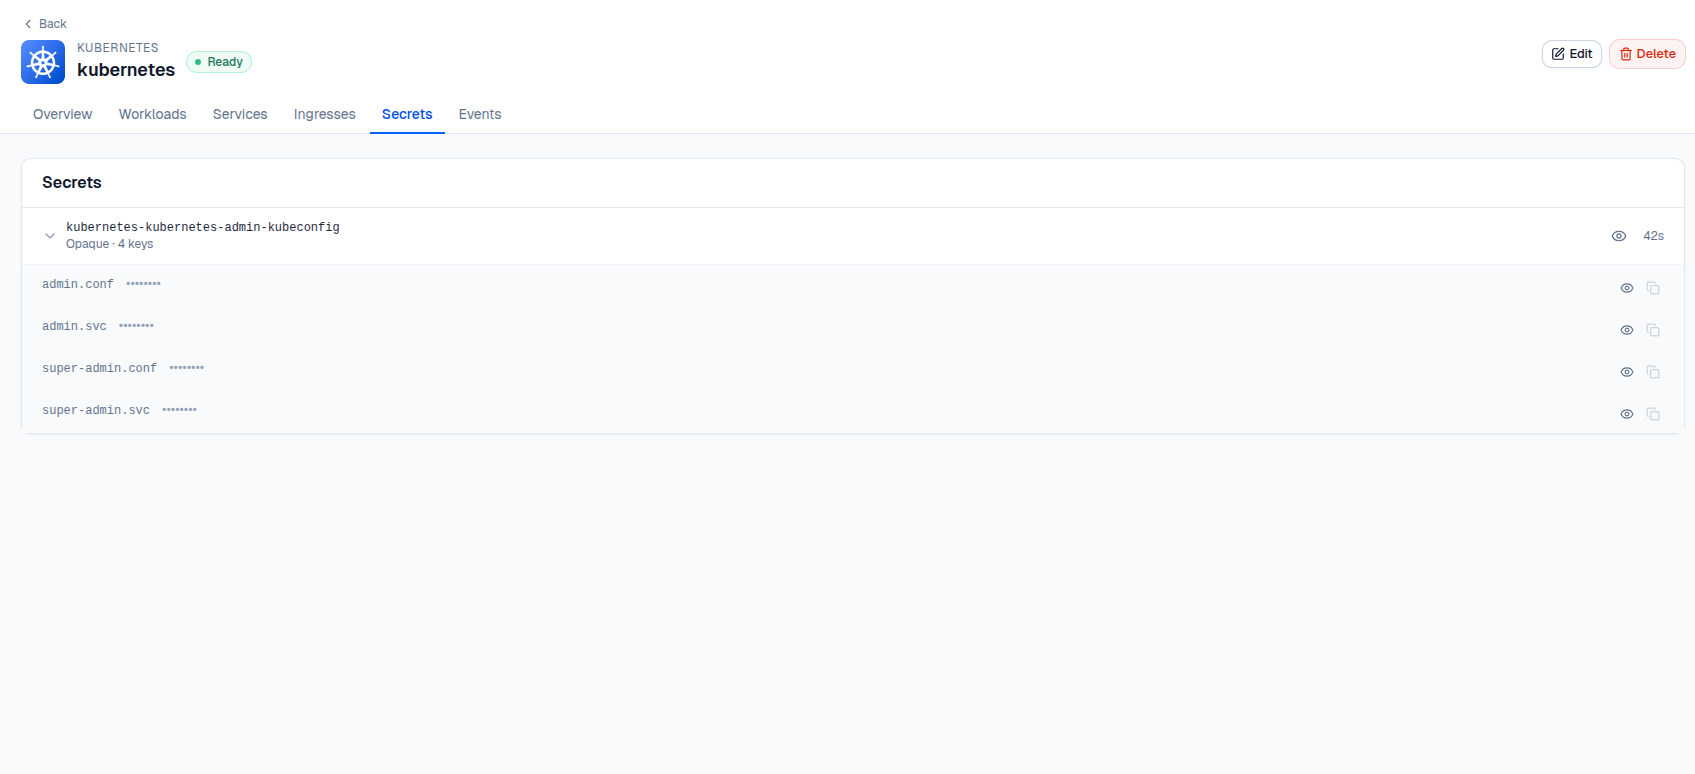
Get your kubeconfig
In the dashboard, open the cluster application → Secrets tab → download admin.conf.
Or via CLI:
kubectl get secret -n tenant-team1 kubernetes-dev-admin-kubeconfig \
  -o jsonpath='{.data.admin\.conf}' | base64 -d > kubeconfig-dev.yaml

export KUBECONFIG=kubeconfig-dev.yaml
kubectl get nodes
NAME                              STATUS   ROLES           AGE   VERSION
kubernetes-dev-md0-vn8dh-jjbm9   Ready    ingress-nginx   4m    v1.33.2
kubernetes-dev-md0-vn8dh-xhsvl   Ready    ingress-nginx   3m    v1.33.2
Deploy your apps with standard kubectl or helm — no vendor-specific tooling needed.
Learn more
Join the community
- GitHub
- Telegram group
- Slack group (get invite at https://slack.kubernetes.io)
- Community Meeting Calendar